Setting up and managing the Home Page
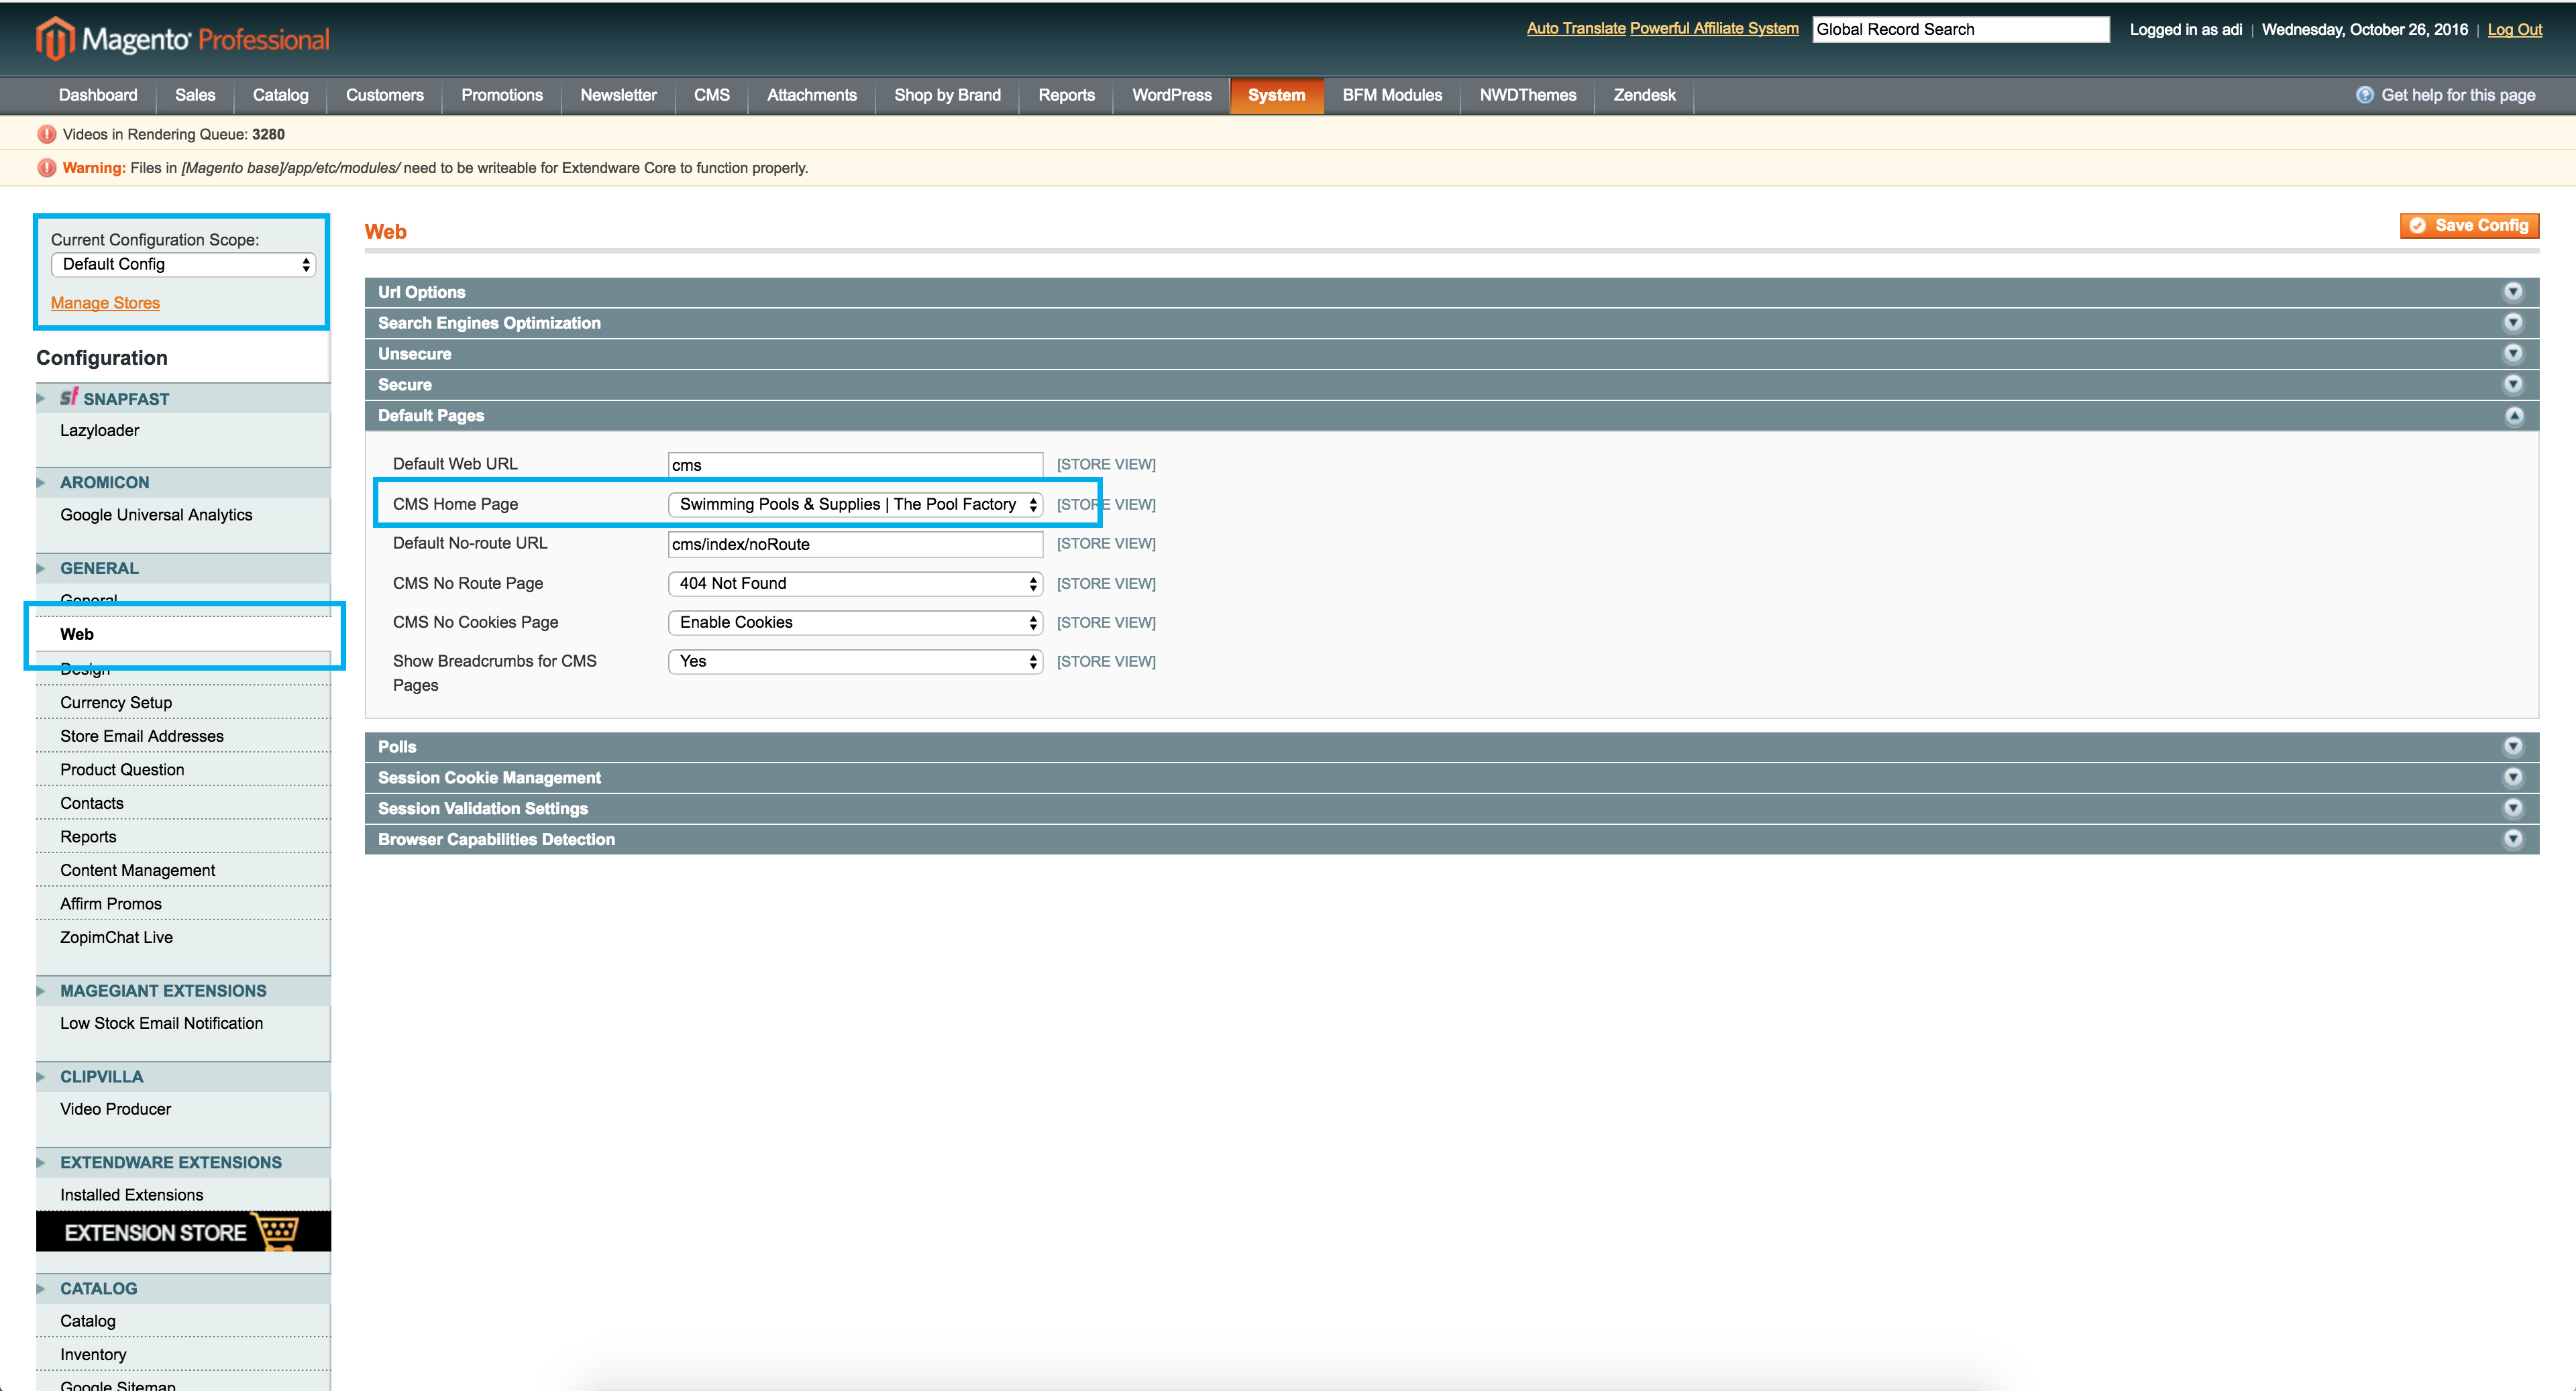
1. Set cms page as homepage
- Go to System -> Configuration -> Web -> Default Pages and select from the dropdown the newly created page.
2. Manage CMS page
- Go to CMS -> Pages and select New homepage
- This page uses 2 cms blocks a shortcode for the carousel and the paragraph for the marketing text. (See Fig 1)
- Cms blocks can be managed in the CMS -> Static Blocks and search them by identifier as mentioned bellow.
Marketing text (text in CMS page)
The marketing text can be modified directly in the cms page, here is the code:
<h3 class="col-xs-12 text-center"><em>Shop Swimming Pools & Supplies at The Pool Factory</em></h3>
HP-banner (CMS block)
Change the the image with the one desired, default size should be 1170px X 350px.
Hp-marketing (CMS block)
- This CMS block has 2 main sections: the main marketing section (1 image) and the secondary marketing section (4 images), for both sections you just have to upload the images via the editor.
- For the main marketing section, default size should be 600px X 600px
- For the secondary marketing section, default sizes should be
Example for main marketing section:
<div class="col-xs-12 col-sm-12 col-lg-6">
	<a href="thepoolfactory.com/test">
    	<img class="img-responsive" src="https://dummyimage.com/600x600/40B3DF/ffffff.png&text=Main+marketing+image">
	</a>
</div>
Example for secondary marketing section:
<div class="col-xs-12 col-sm-6">
    <a href="thepoolfactory.com/test1">
        <img class="img-responsive" src="https://dummyimage.com/300x300/40B3DF/ffffff.png&text=Marketing+image+3">
    </a>
</div>
Class warning
Do not remove any classes from the current template, only update images and urls. So for example in the Hp-marketing cms block, you have a class of "w-mb" on the first two items from the secondary marketing section.
Shortcode for the carousel
- You don't change anything in the shortcode but you have to go to NWDThemes -> Revolution Slider -> Slider Overview
- Click on Slider Homepage from the Revolution Sliders section
- How to edit a slide
- Click on the slide that you want to edit (See Fig 2)
- After the page loads, click on the slide image and then delete the image
- Add a new image for the current slide by hovering the Add Layer and click on Image (See Fig 3)
2. How to add a link for a slide
- Click on the slide you want to edit
- Click on Actions (See Fig 4)
- Click on the "+" sign from the Actions tab and add the following values:
Event Action Link URL Link Target Link Type Delay Click Simple Link If the link has no http(s) it will be relative so for example if you put in www.google.com the link will redirect to thepoolfactory.com/www.google.com but if you but in https://www.google.com the link will redirect to google. Same Window/New Window a Tag Link
3. How to add a new slide
- Click on Add Slide (See Fig 5) and repeat steps 1 and 2
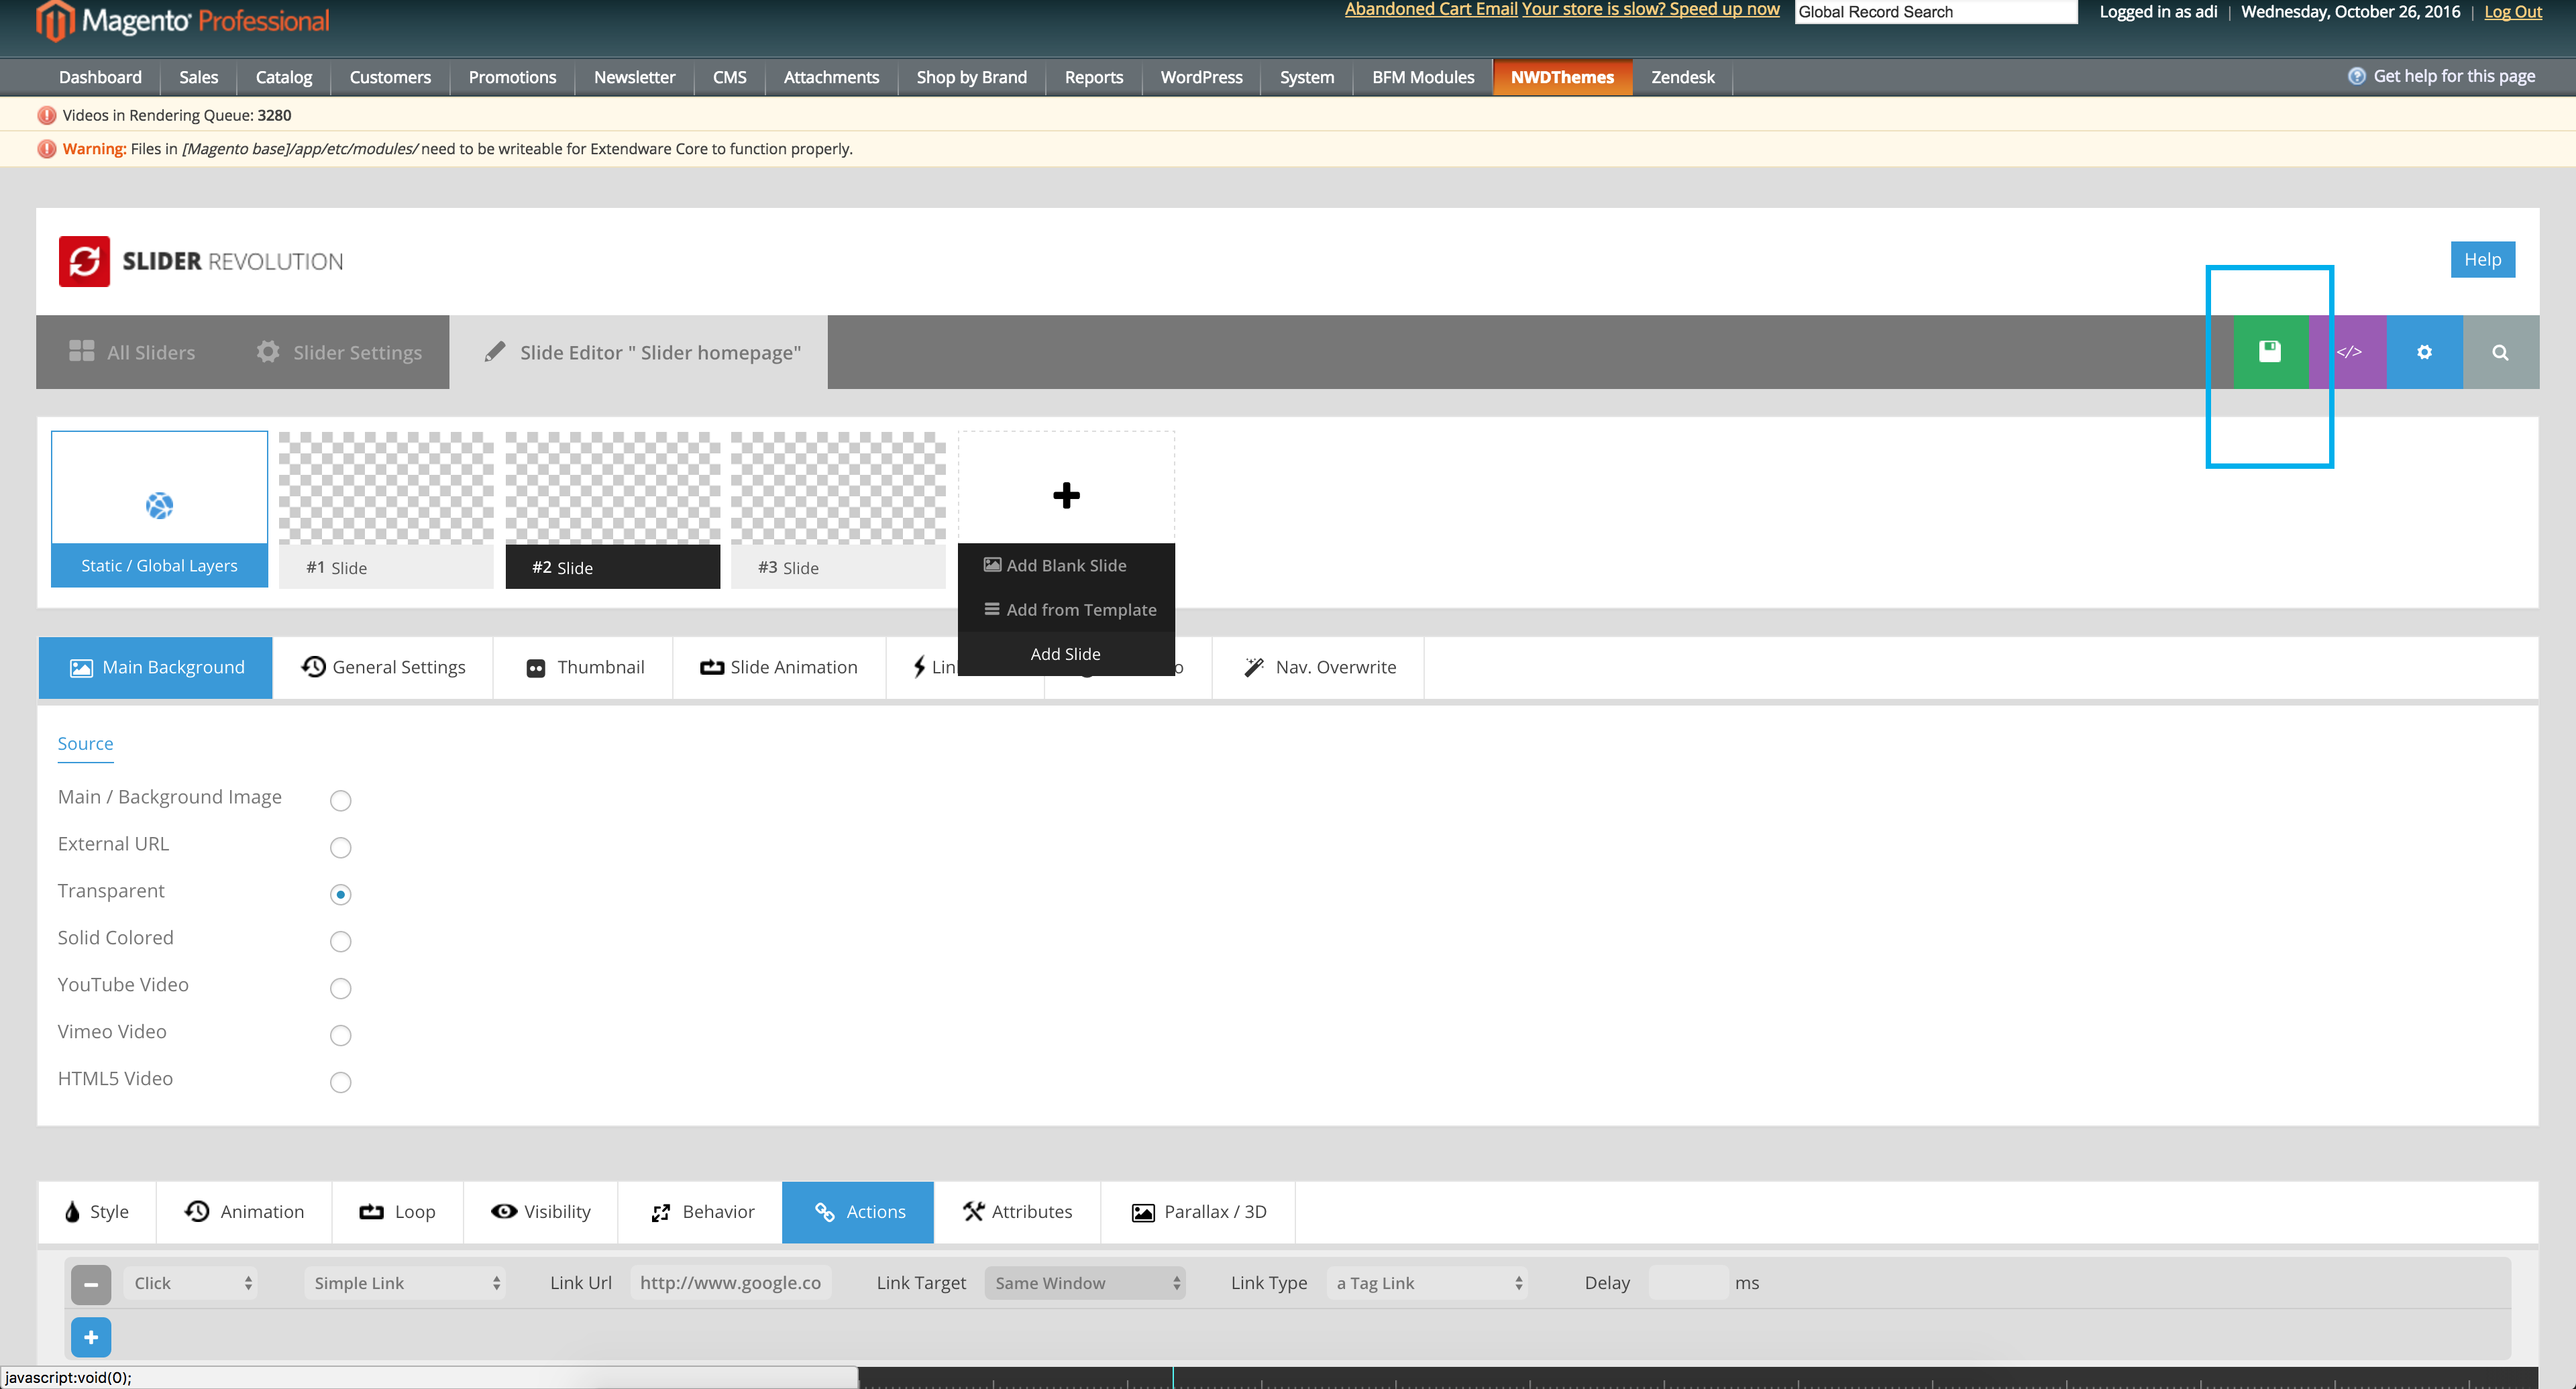
Save
In order to save all your modifications, click on the green save button from the right of the screen ( See Fig 6)
Images
Fig 1
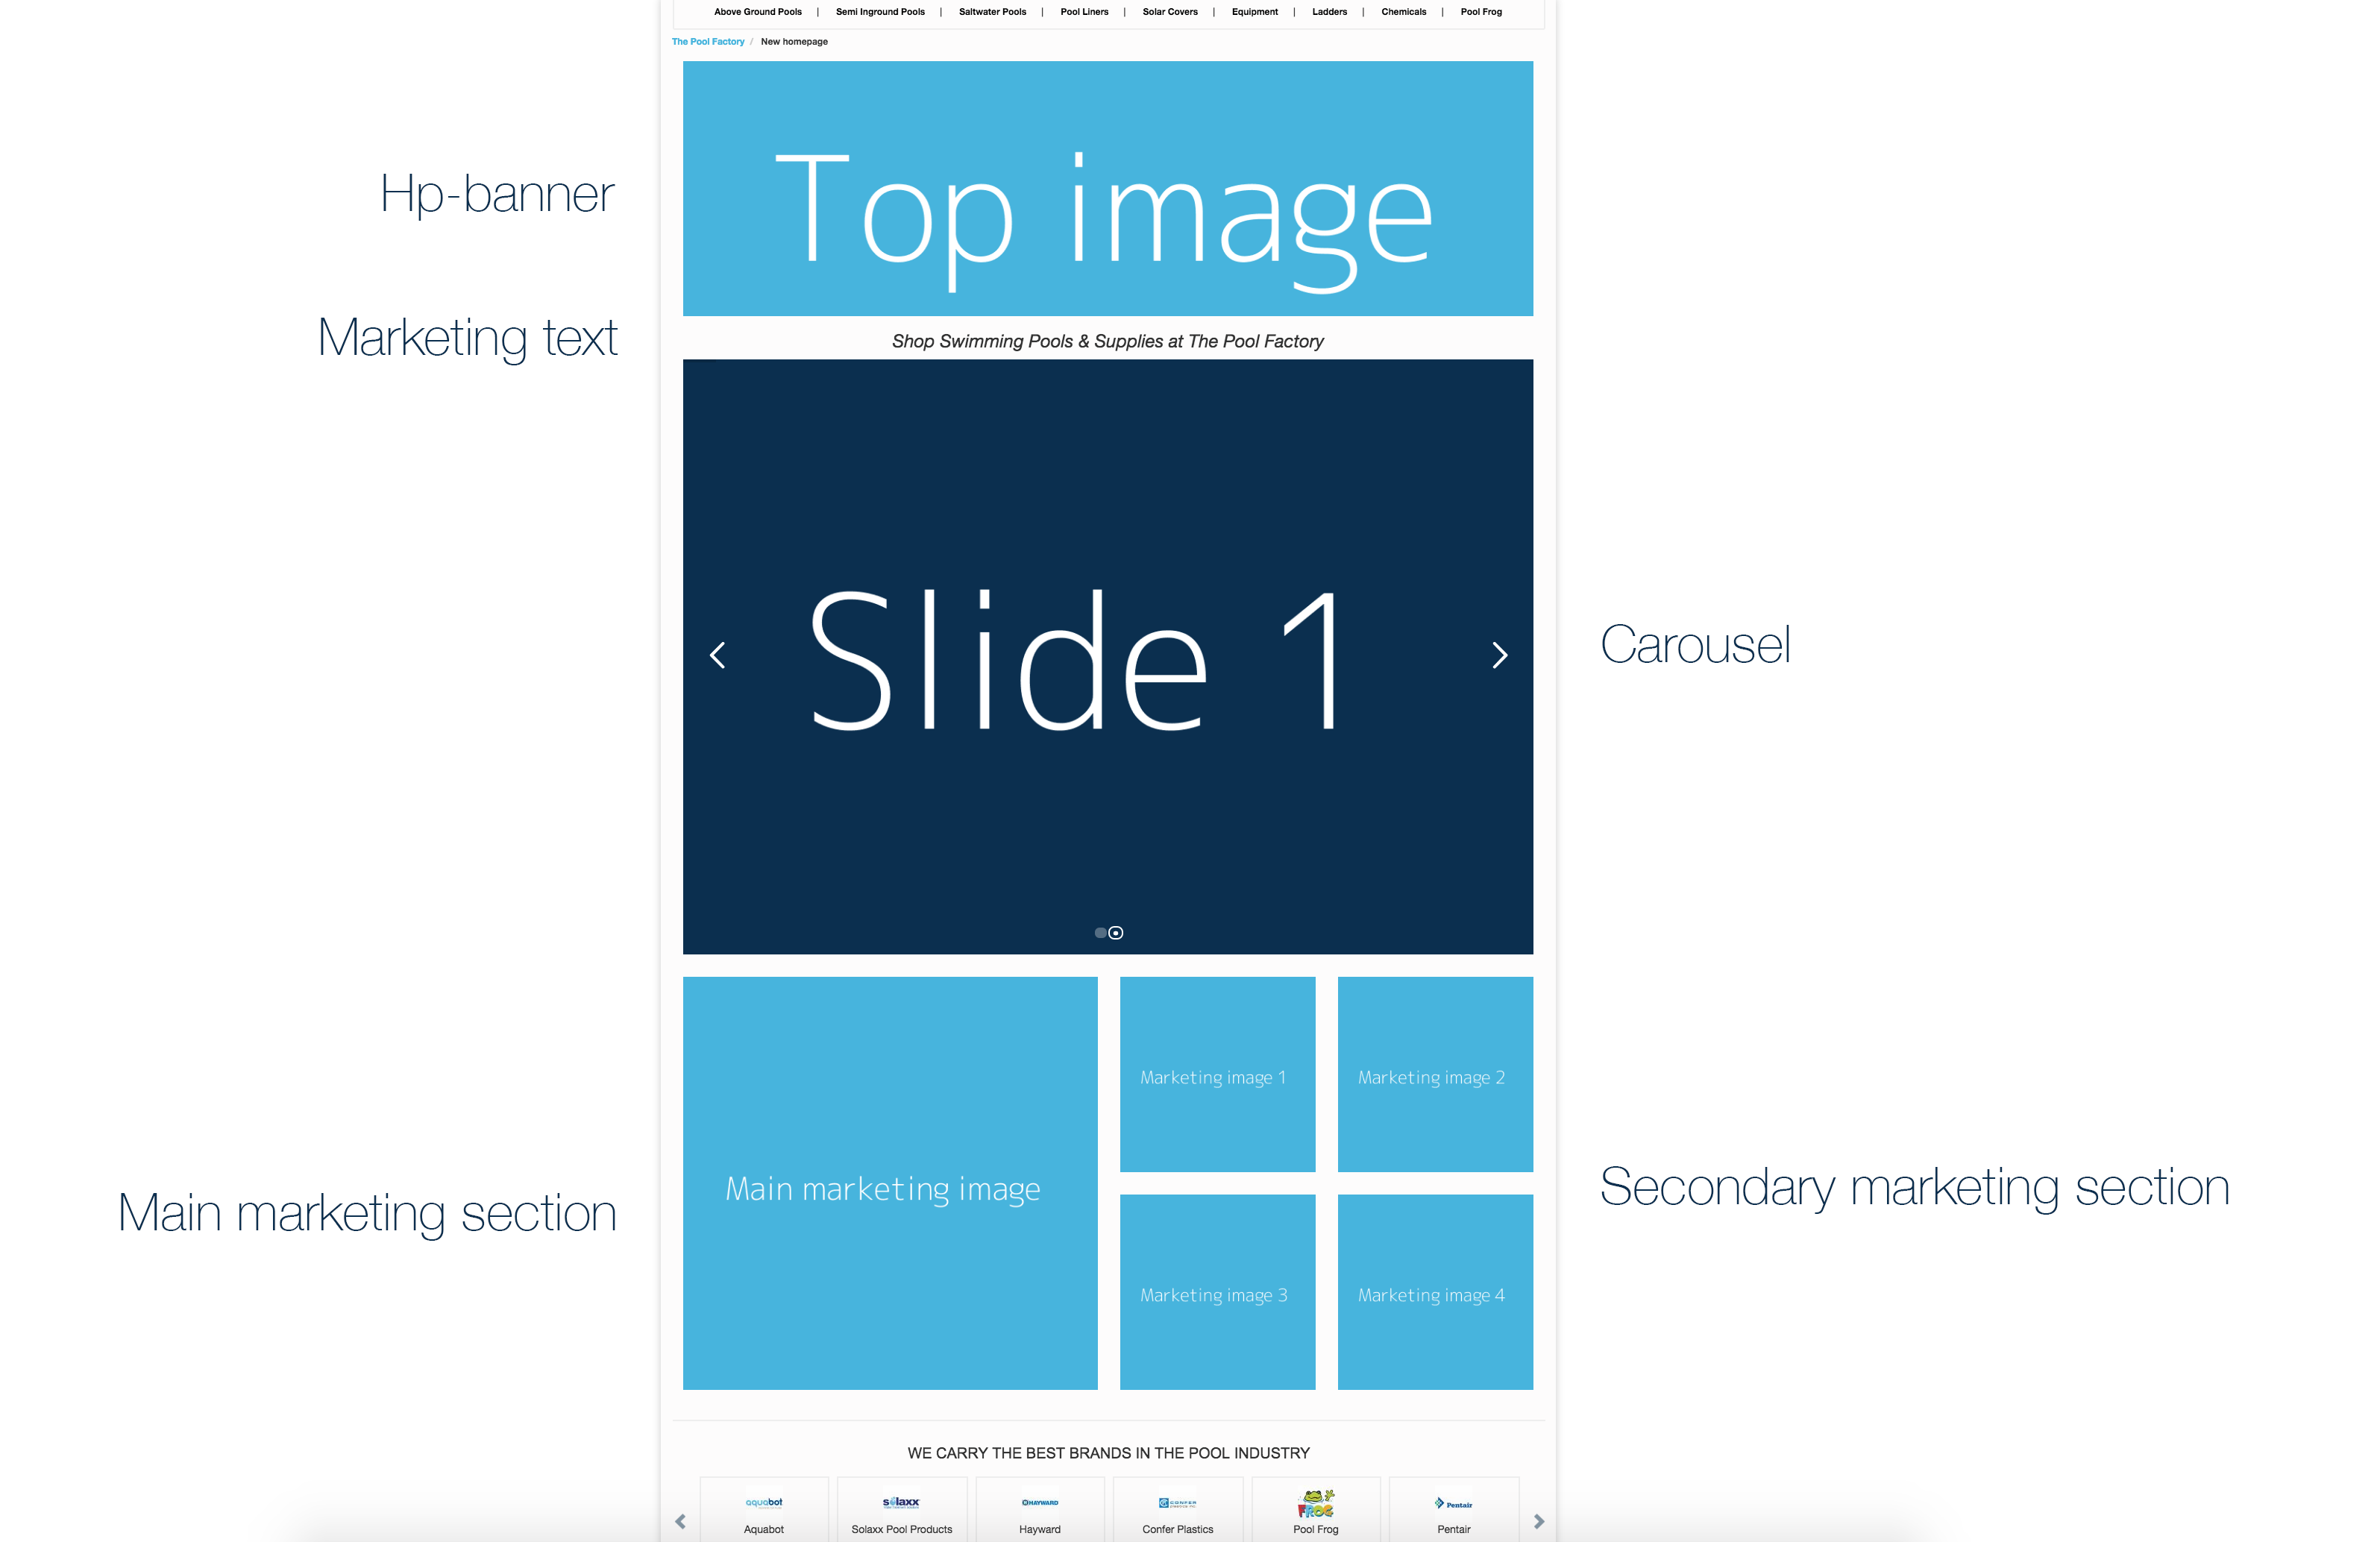
Fig 2
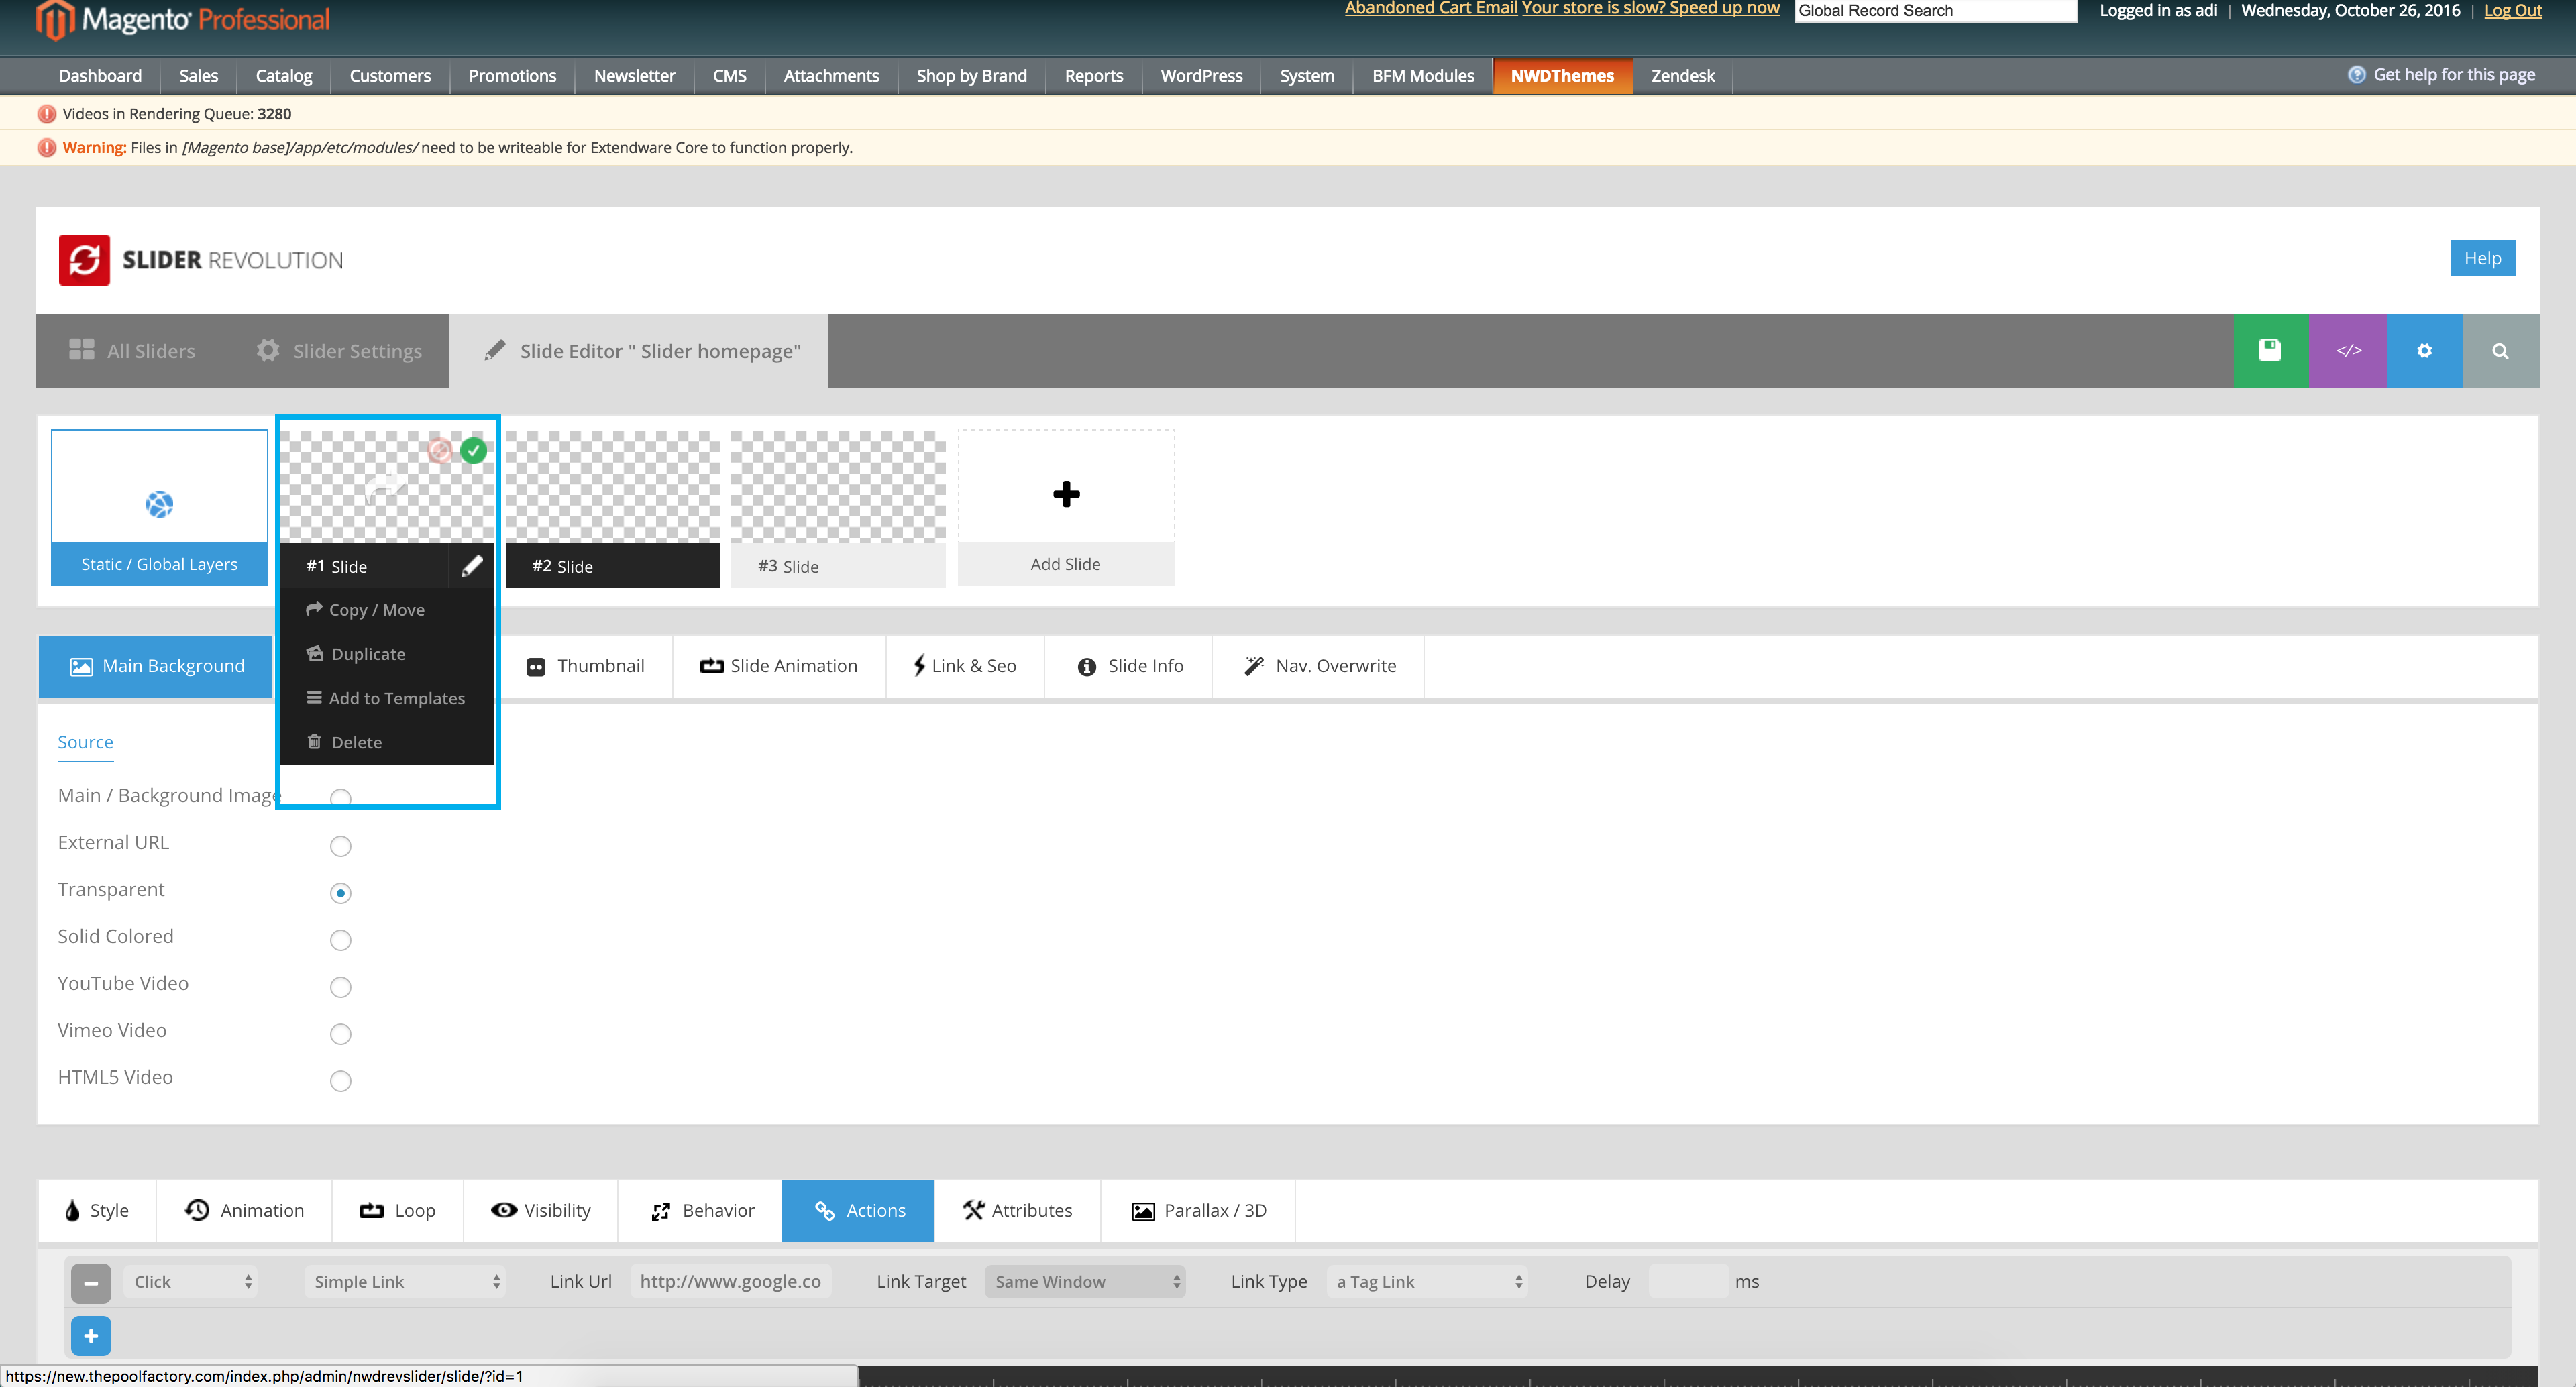
Fig 3
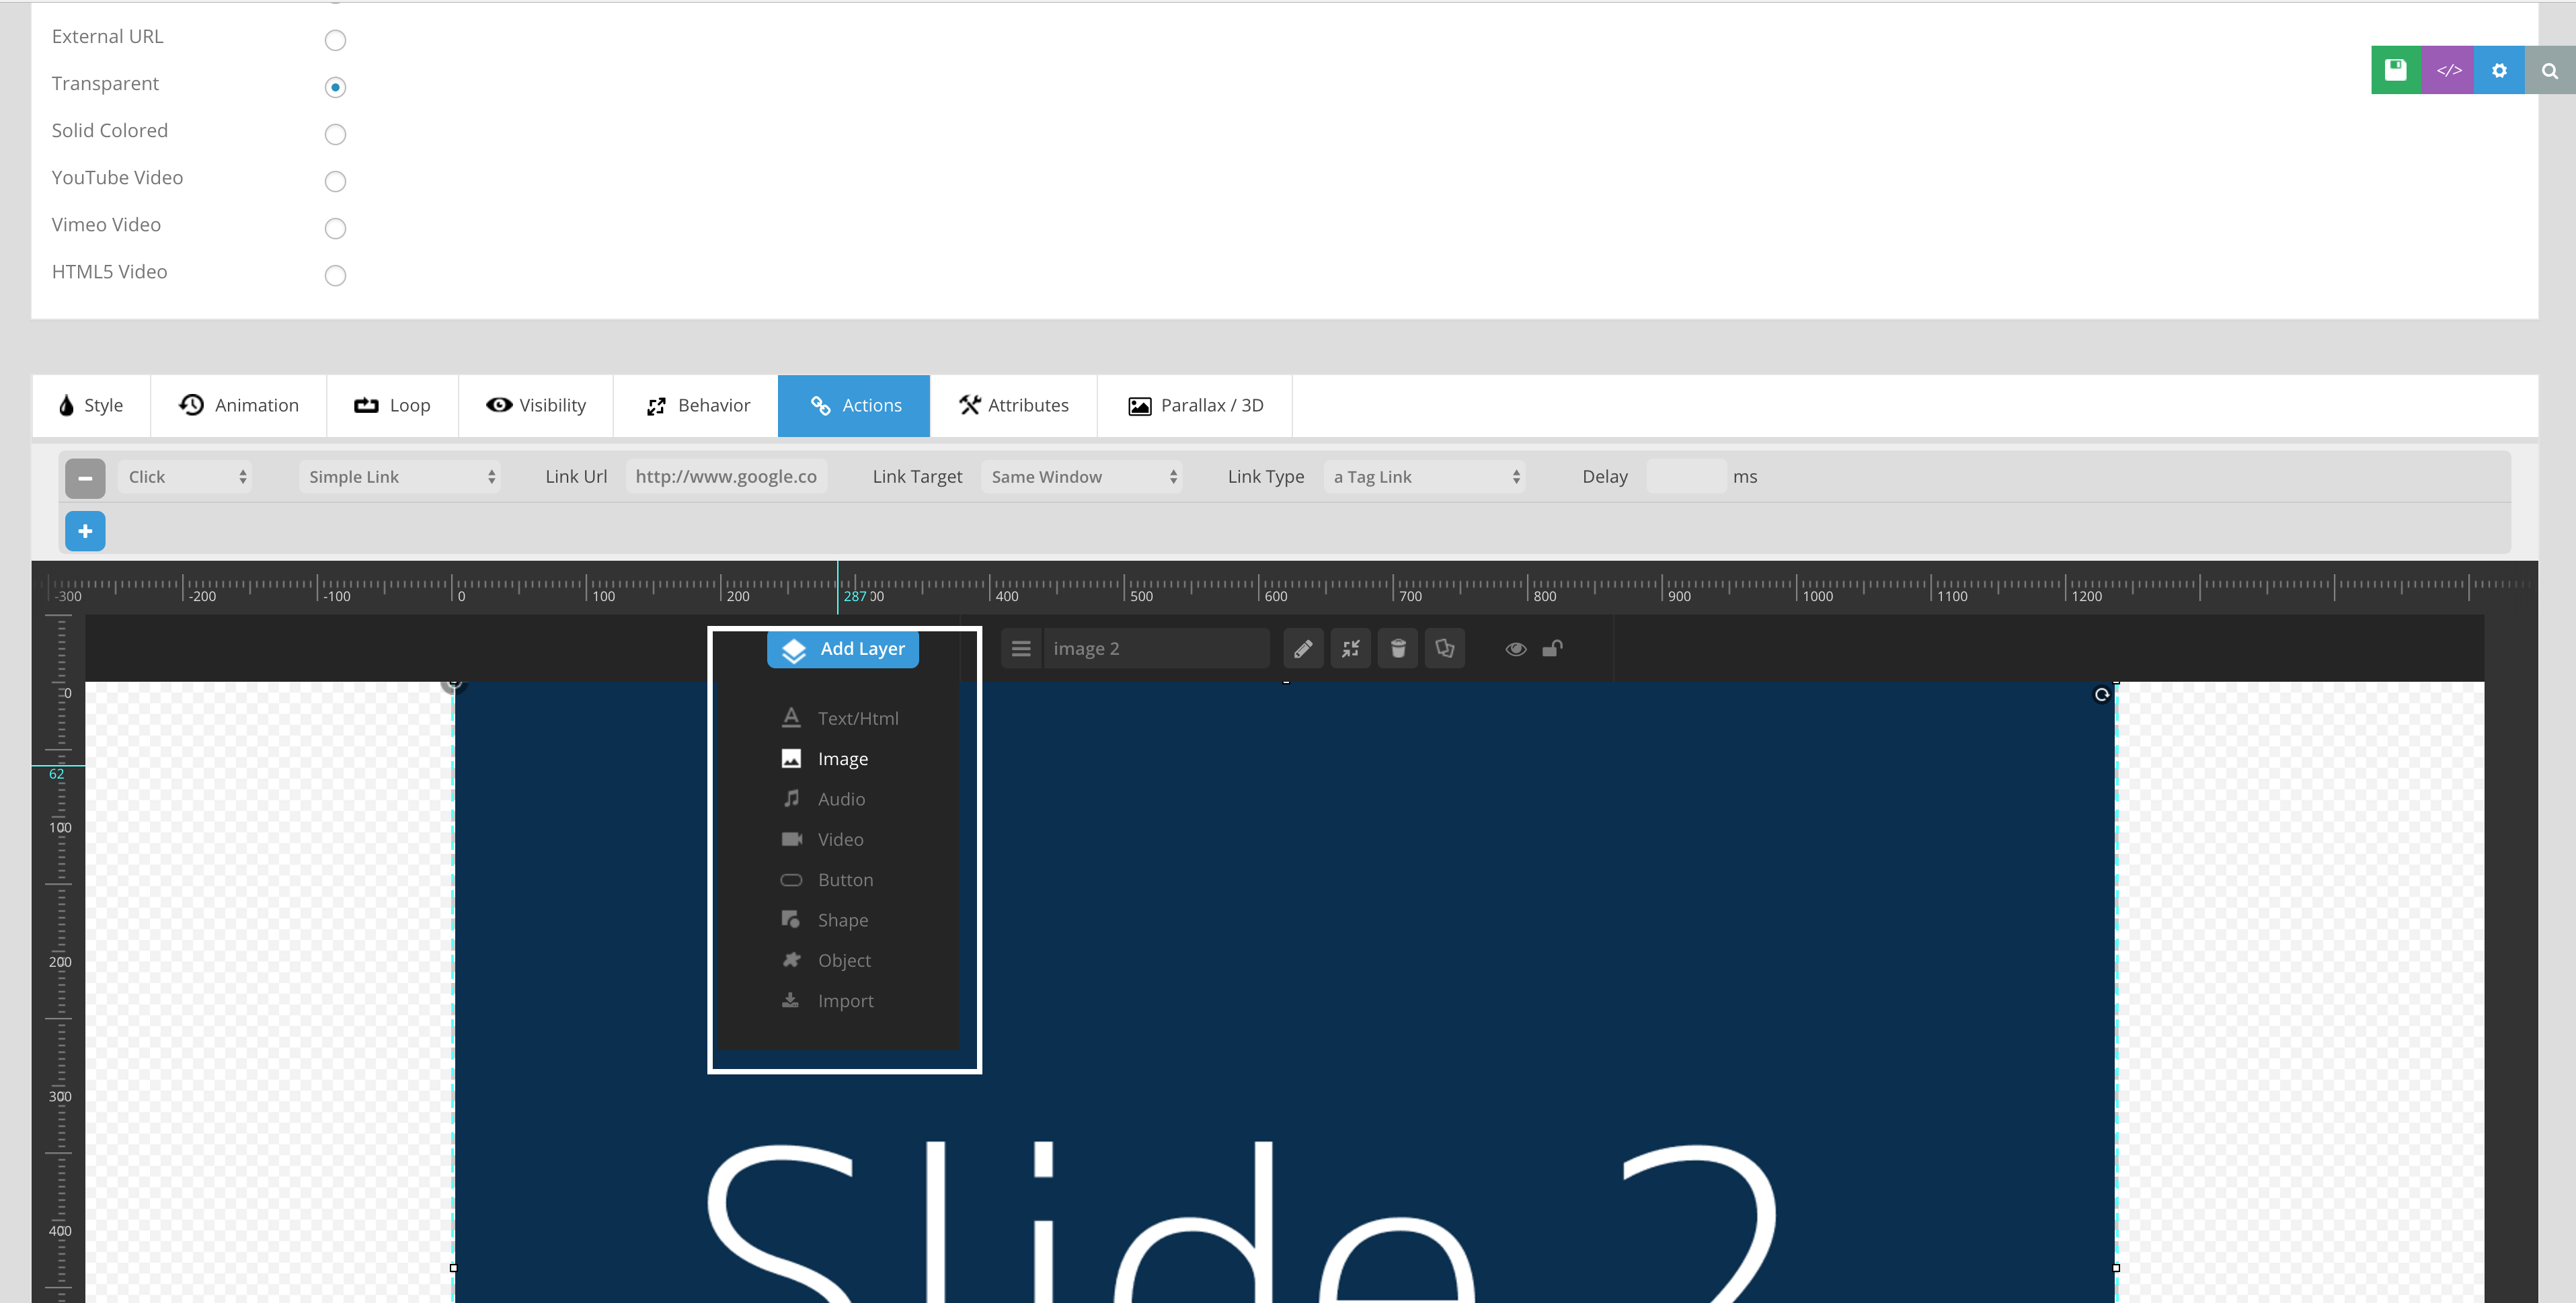
Fig 4
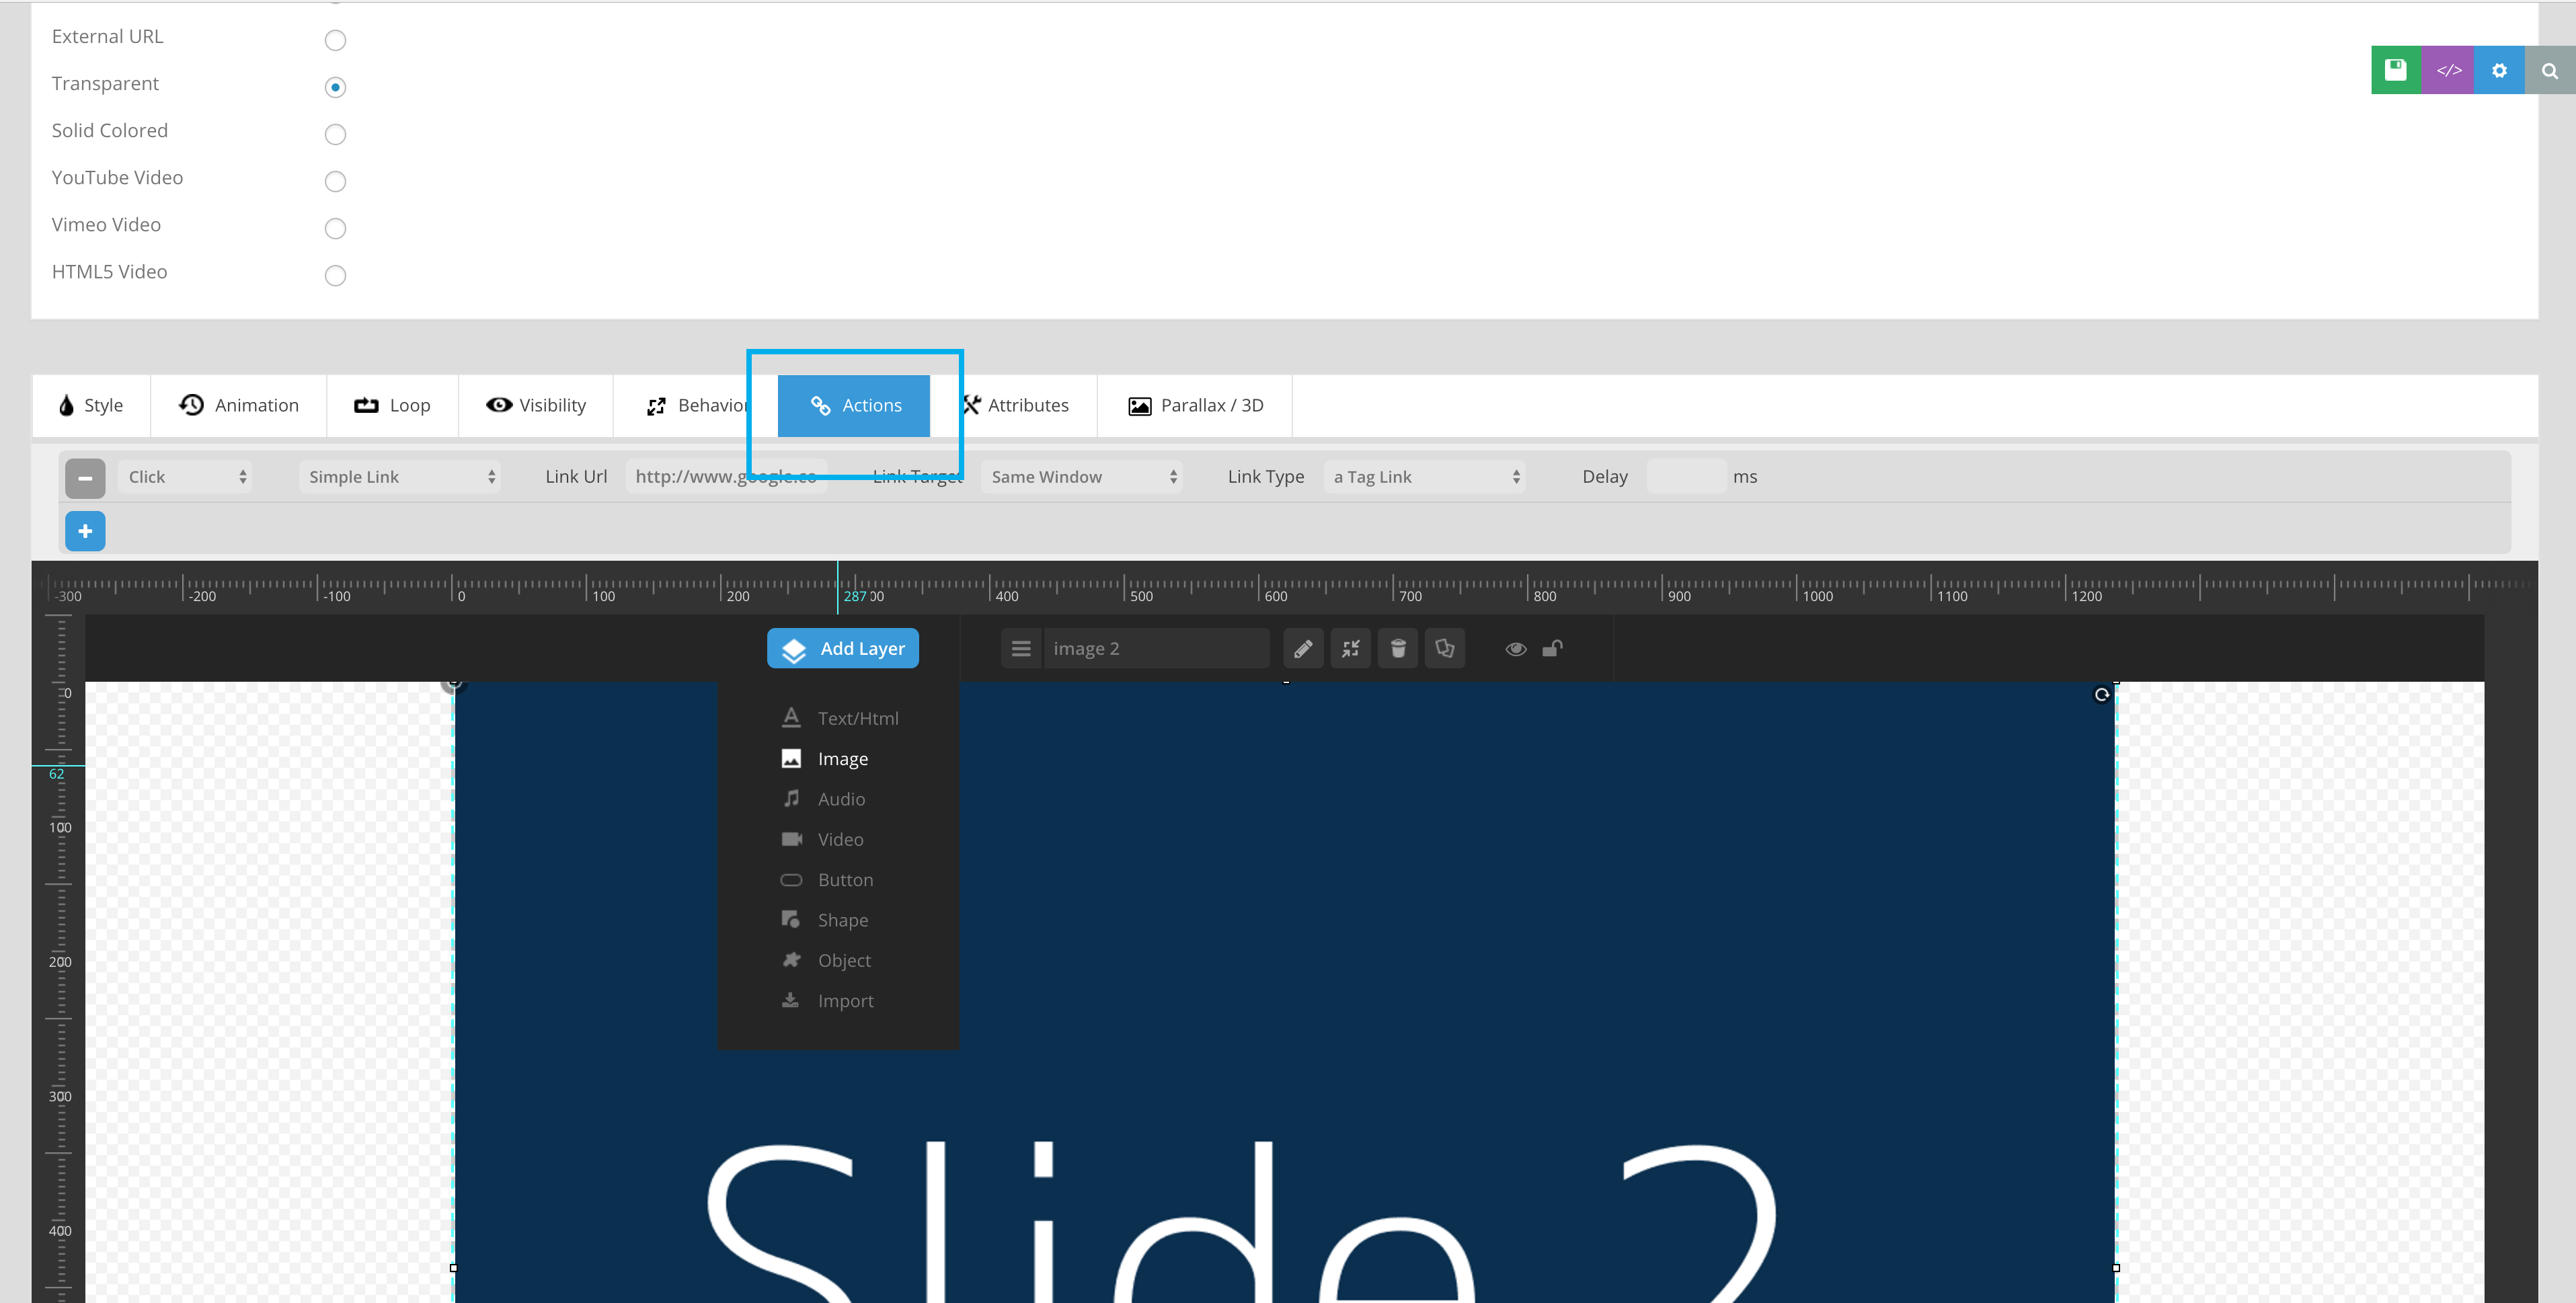
Fig 5
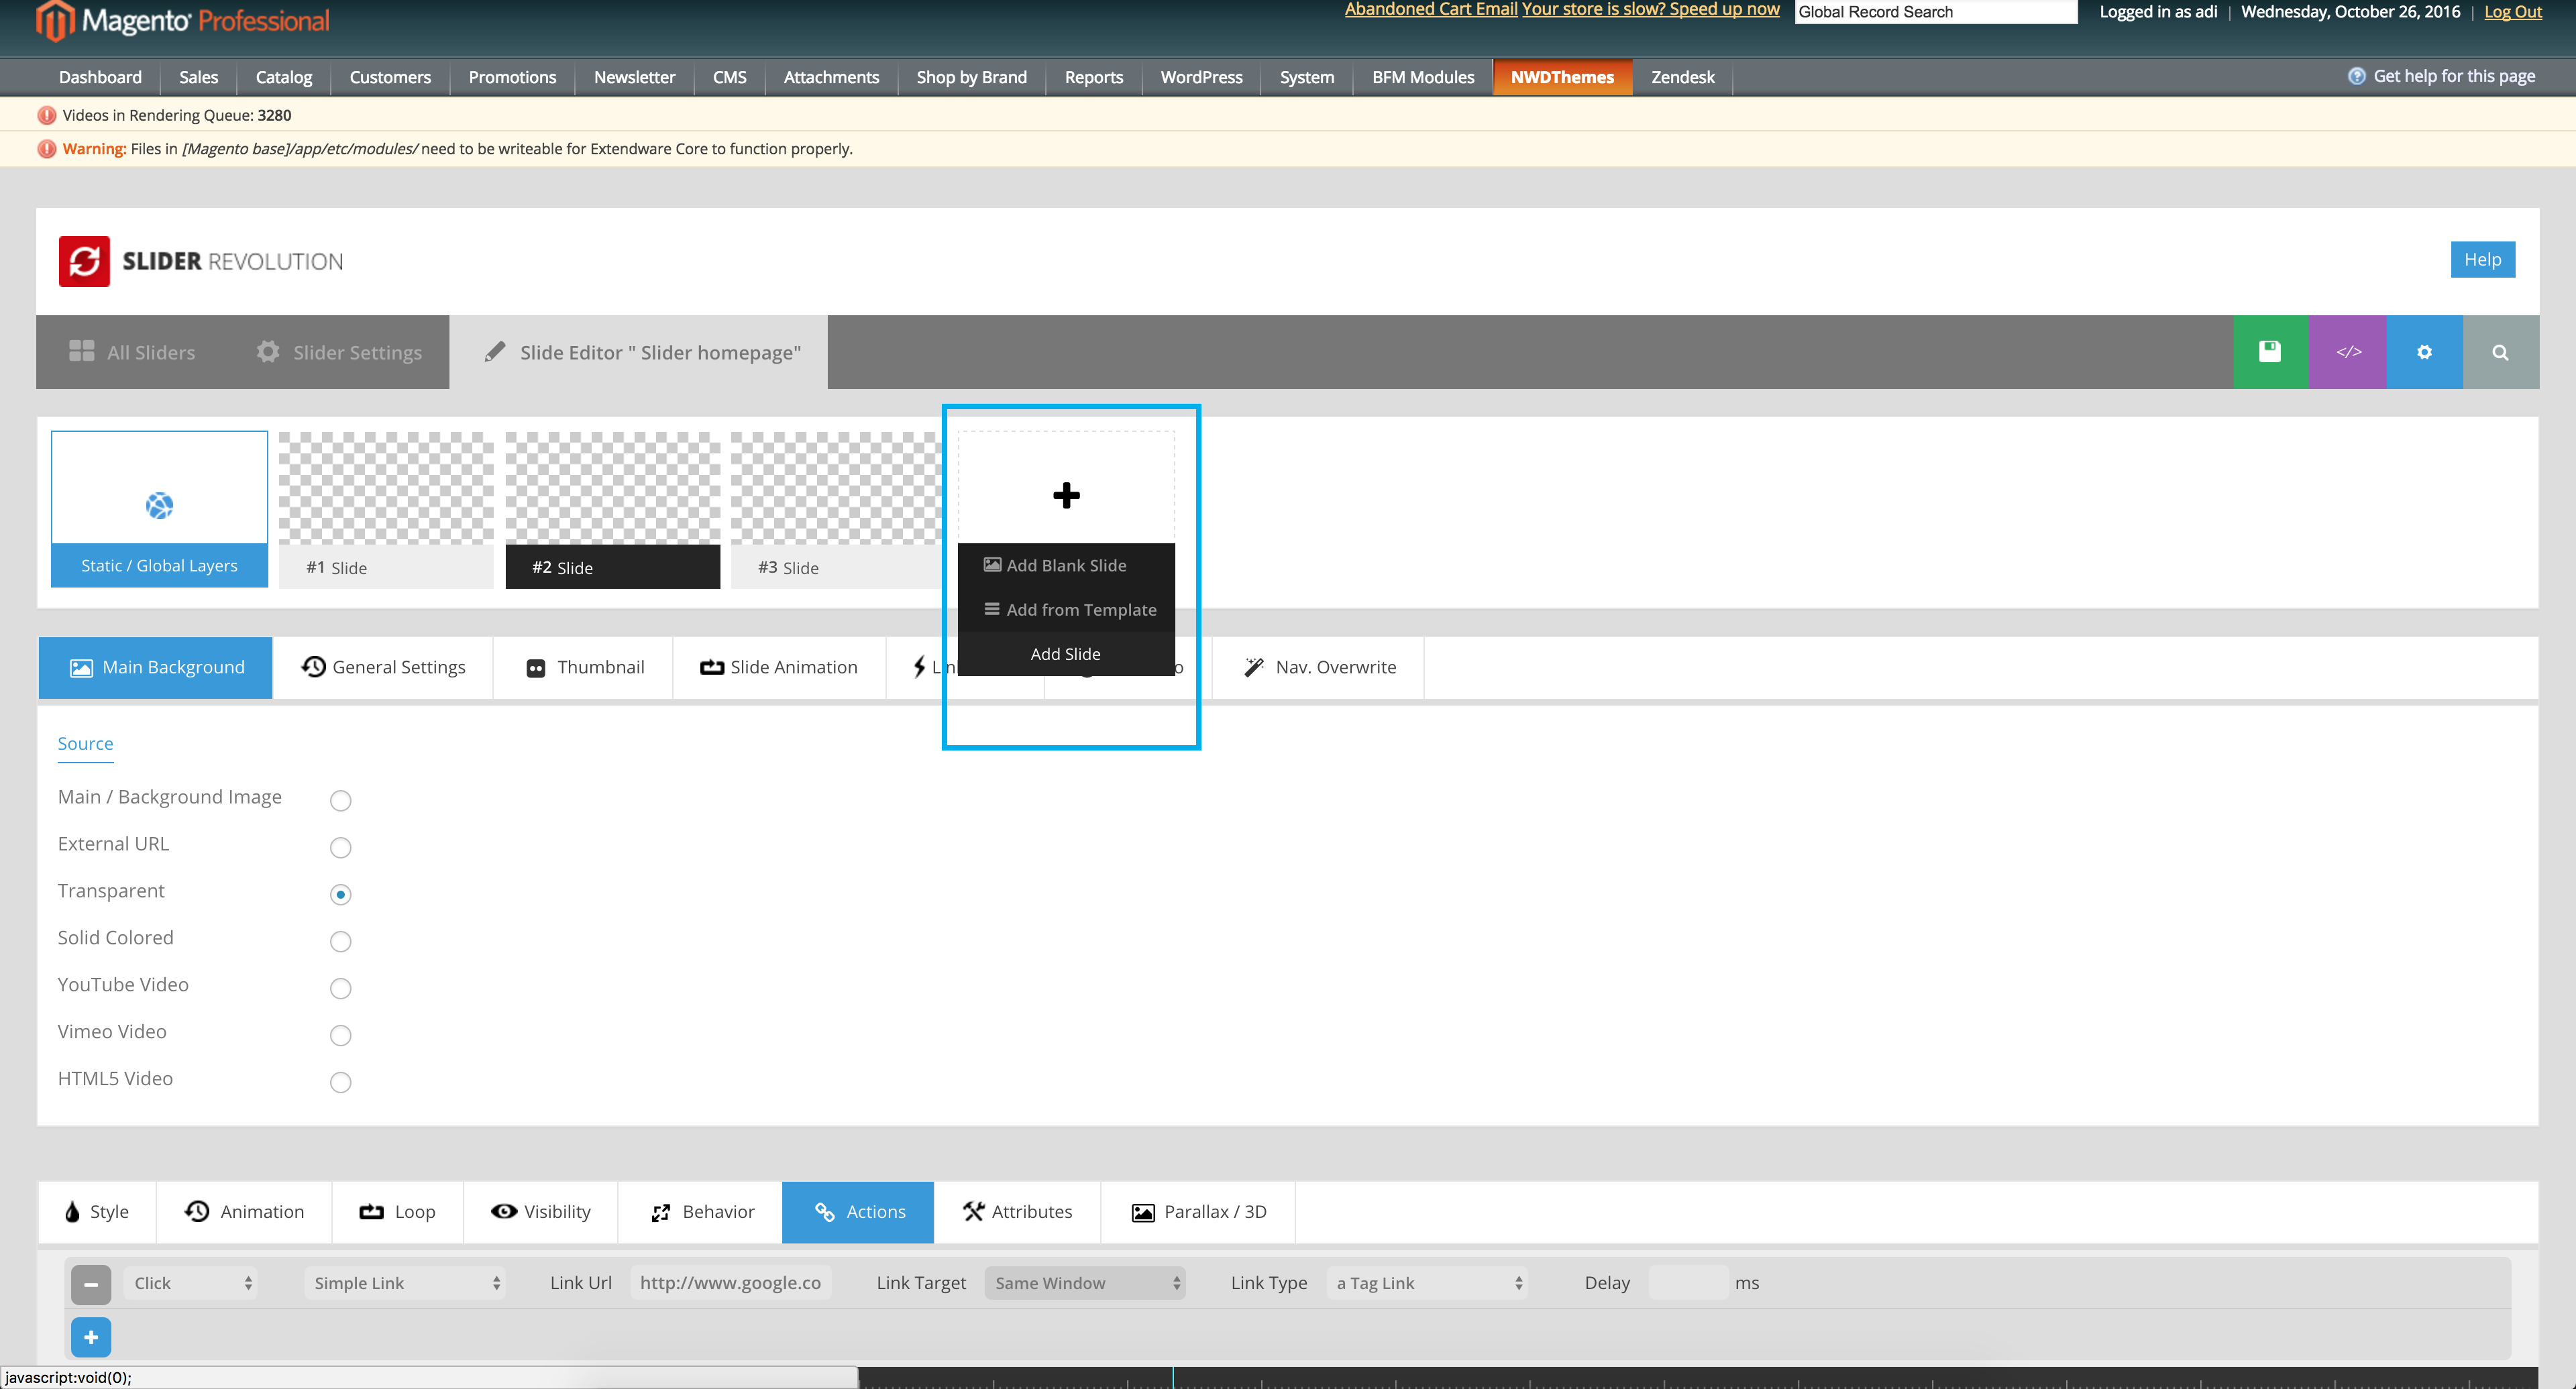
Fig 6
No comments to display
No comments to display